| 维爱迪-动画创作家园 >> 动画资源 >> 绘画教程 >> Photoshop制作HTC Diamond手机 |
一篇关于手机产品设计的教程。其实我觉得这个跟做一个复杂图标是一样的。里面很多效果的设计方法完全可以应用到图标设计中去。
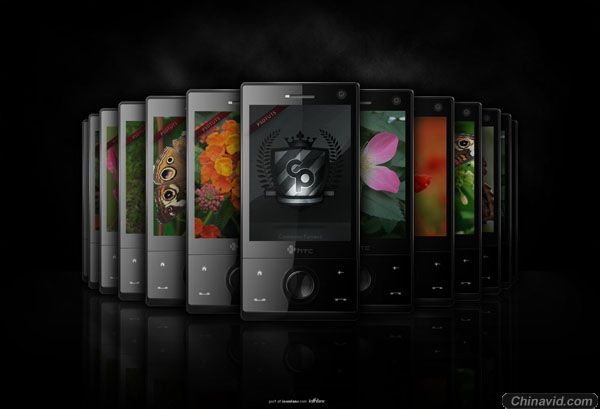
在开始制作之前,我们来看一看在效果,我们将创造图片中的效果。分层一直是我们的惯例。
Step 1
Let's start by making a new white document at 1000px by 1000px.
新建一个空白图像,背景白色,大小为1000*1000
Step 2
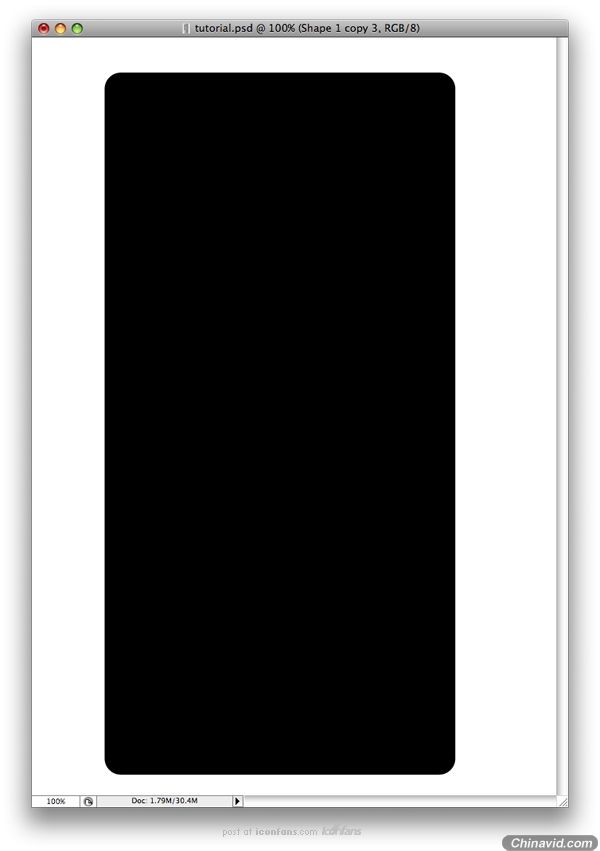
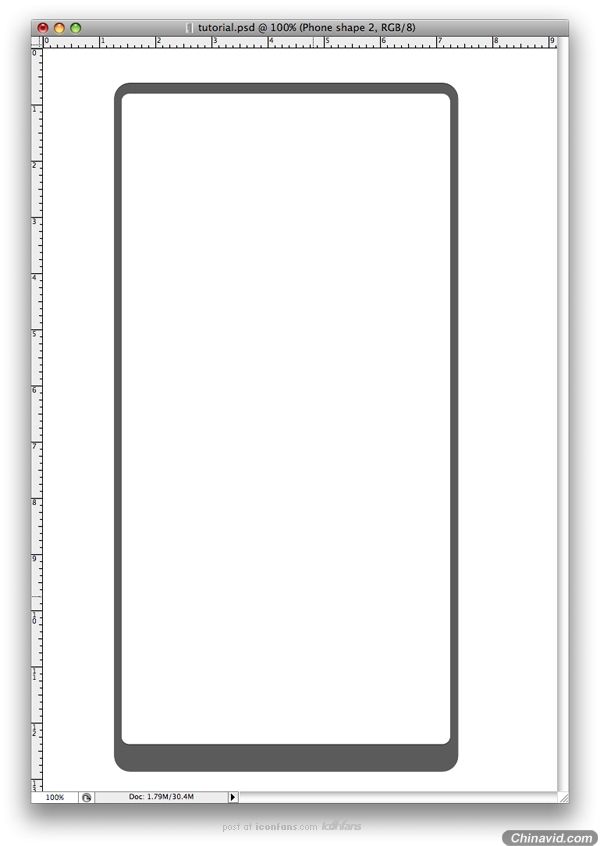
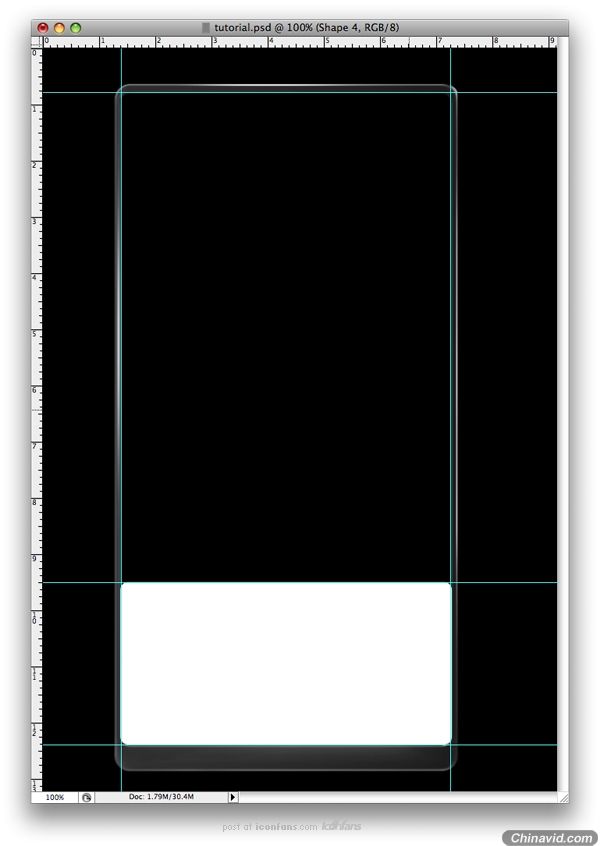
Now we'll make the base of the phone. Using the Rounded Rectangle Tool (U) set to 20 pixels, make a shape as shown below.
现在,我们将做出该手机的主体。使用圆角矩形工具(快捷键U),直径设置为20像素,画出一个形状,如下图所示。
Step 3
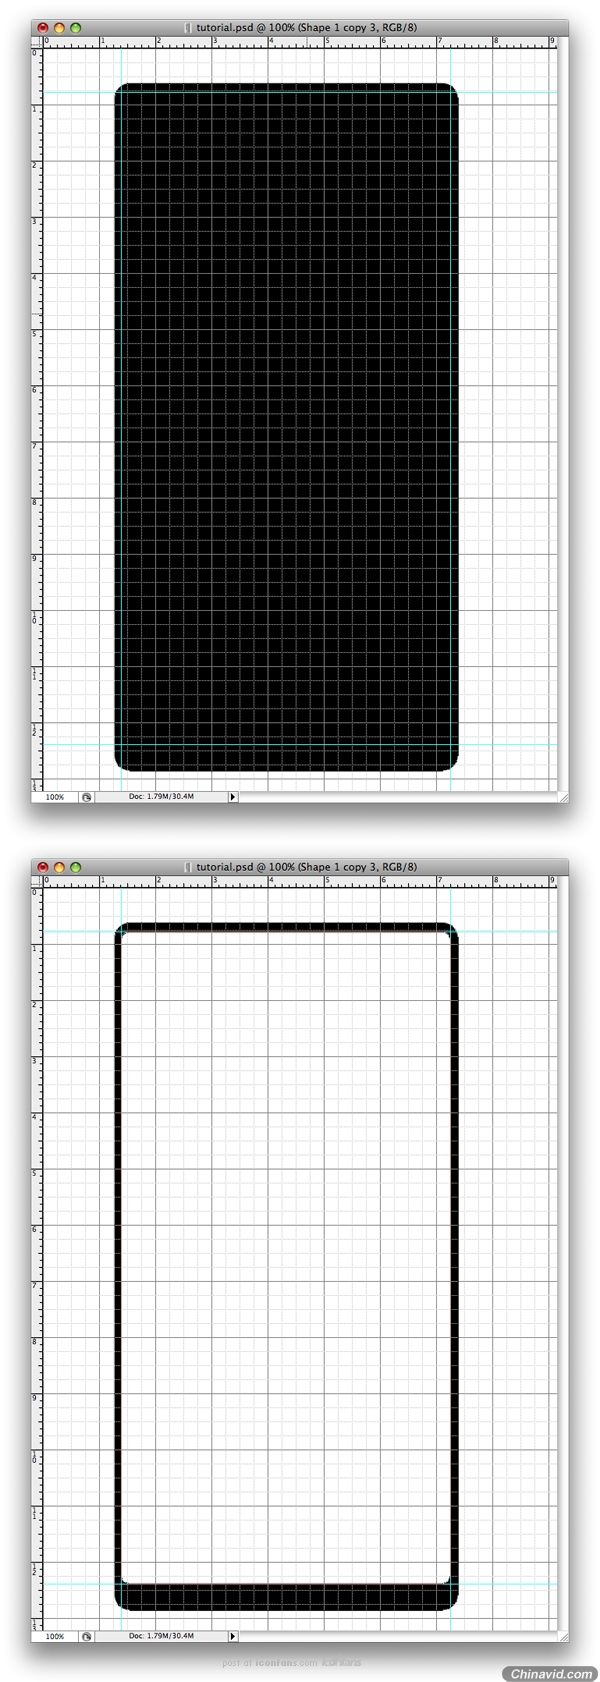
Next using the same tool you need to hold down the Alt button before you start making a shape. This will extract from the first shape you made. Also, use the
rulers and grid to help set the shape of the phone. When you're done name the shape "Phone shape 1."
您需要按住 Alt 的按钮,注意用上一步所用到的工具绘制。 这将从第一个形状所提取的。 此外,使用标尺和网格来帮助定位电话的形状。 当您完成时,请将形状重命名为"电话形状 1"。
Step 4
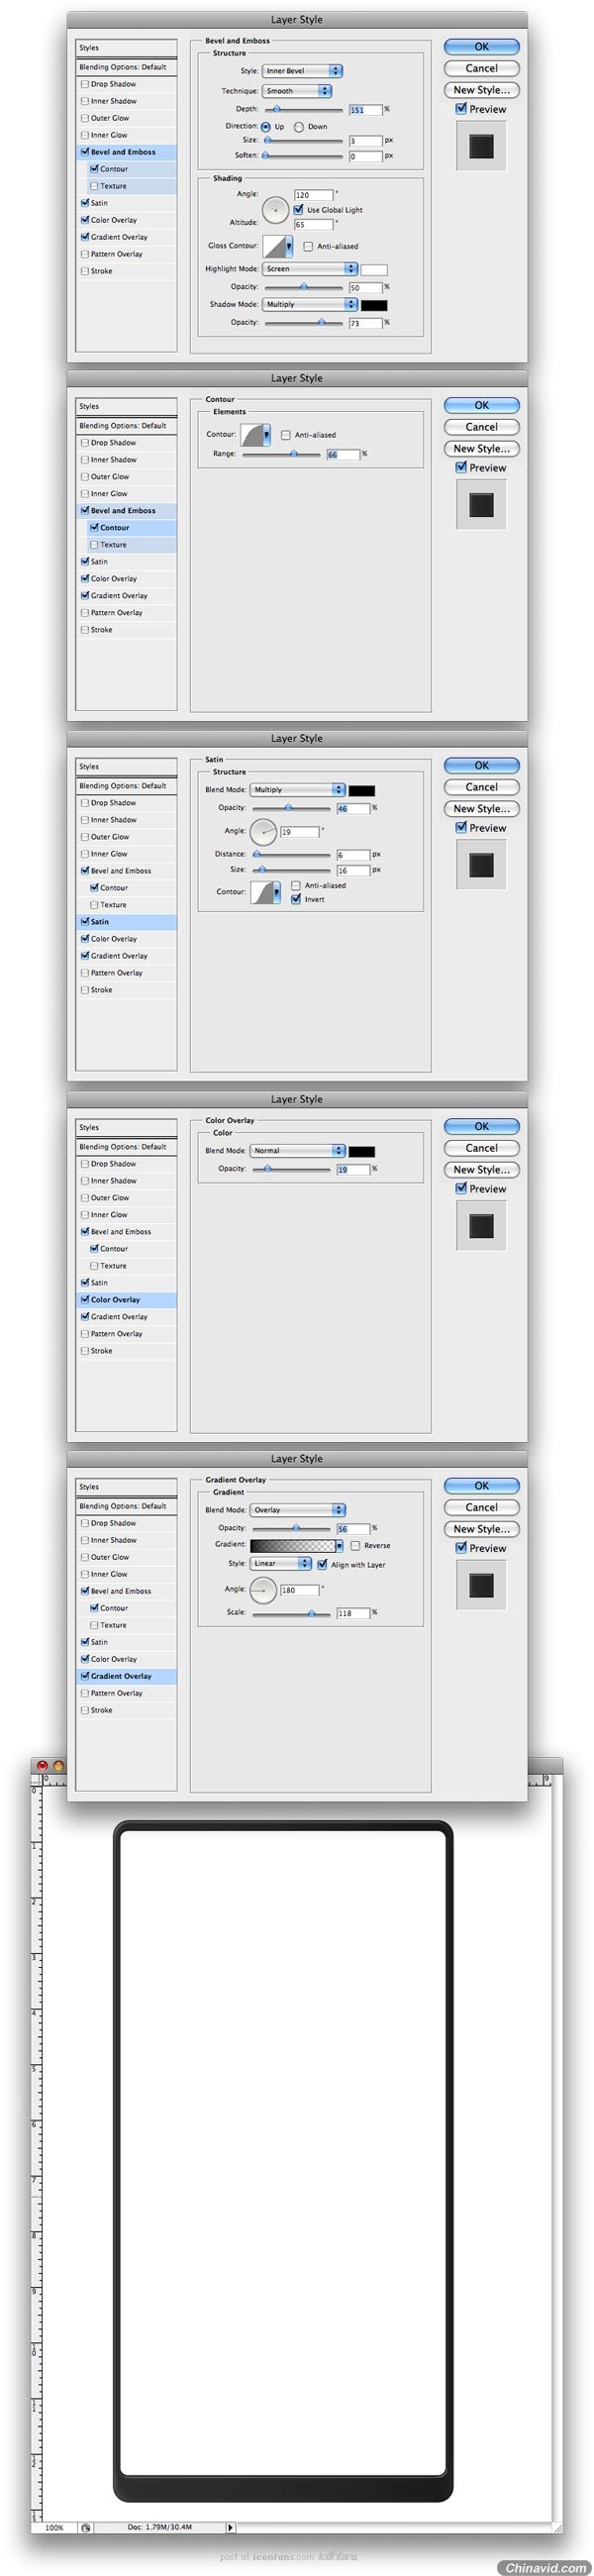
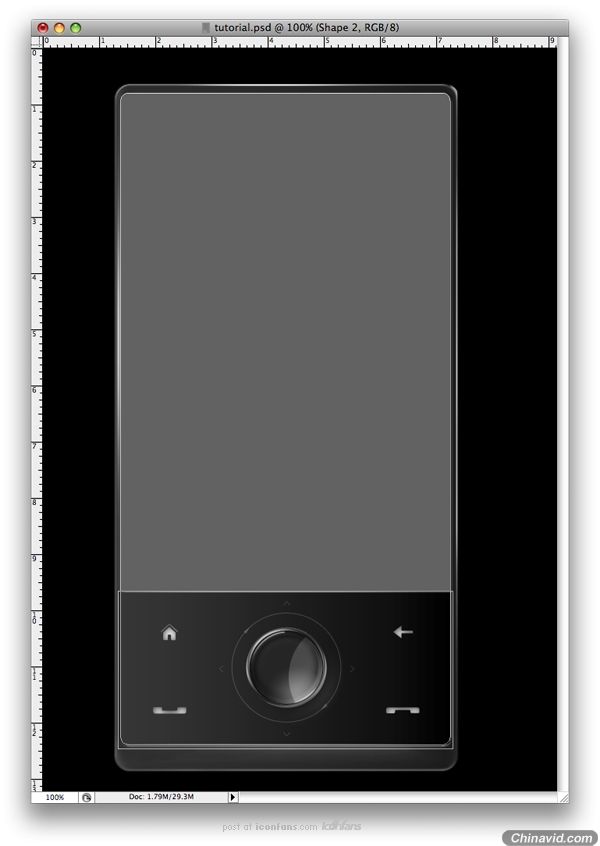
Next you need to duplicate this layer, fill the copy with #5b5b5b, and name it "Phone shape 2."
接下来需要复制此层,填充#5b5b5b ,并将其命名为电话形状2
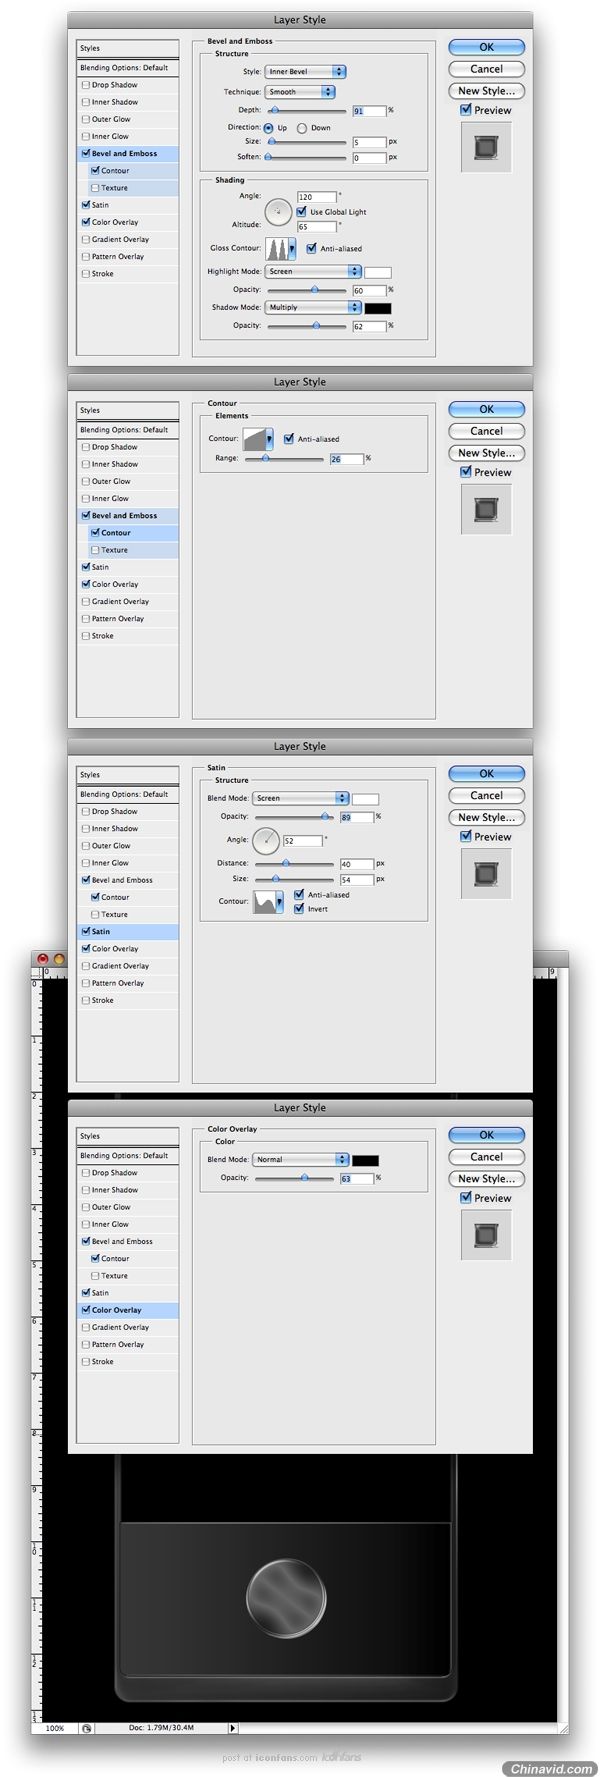
Step 5
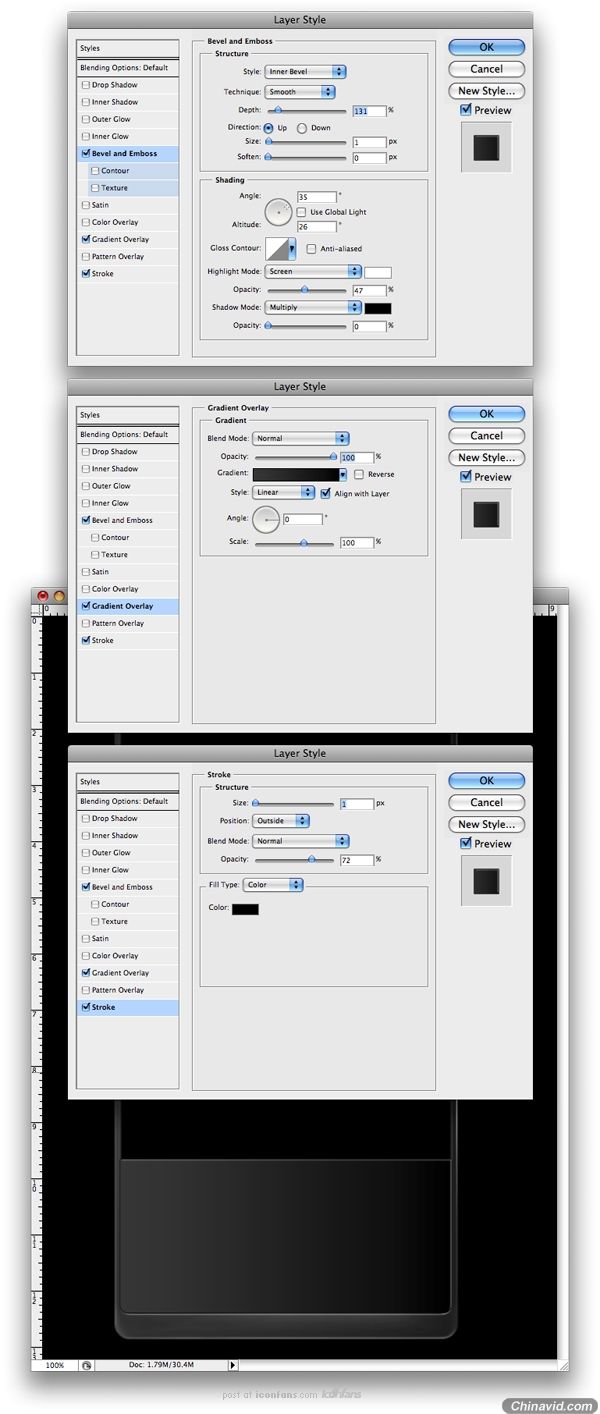
Enter the Blending Options by double-clicking in the "Phone shape 2" layer and enter the settings shown below. You can experiment, but I personally like those settings.
双击"电话形状 2"并设置样式(我根据个人的喜好设置,您可以进行适当的更改)
Step 6
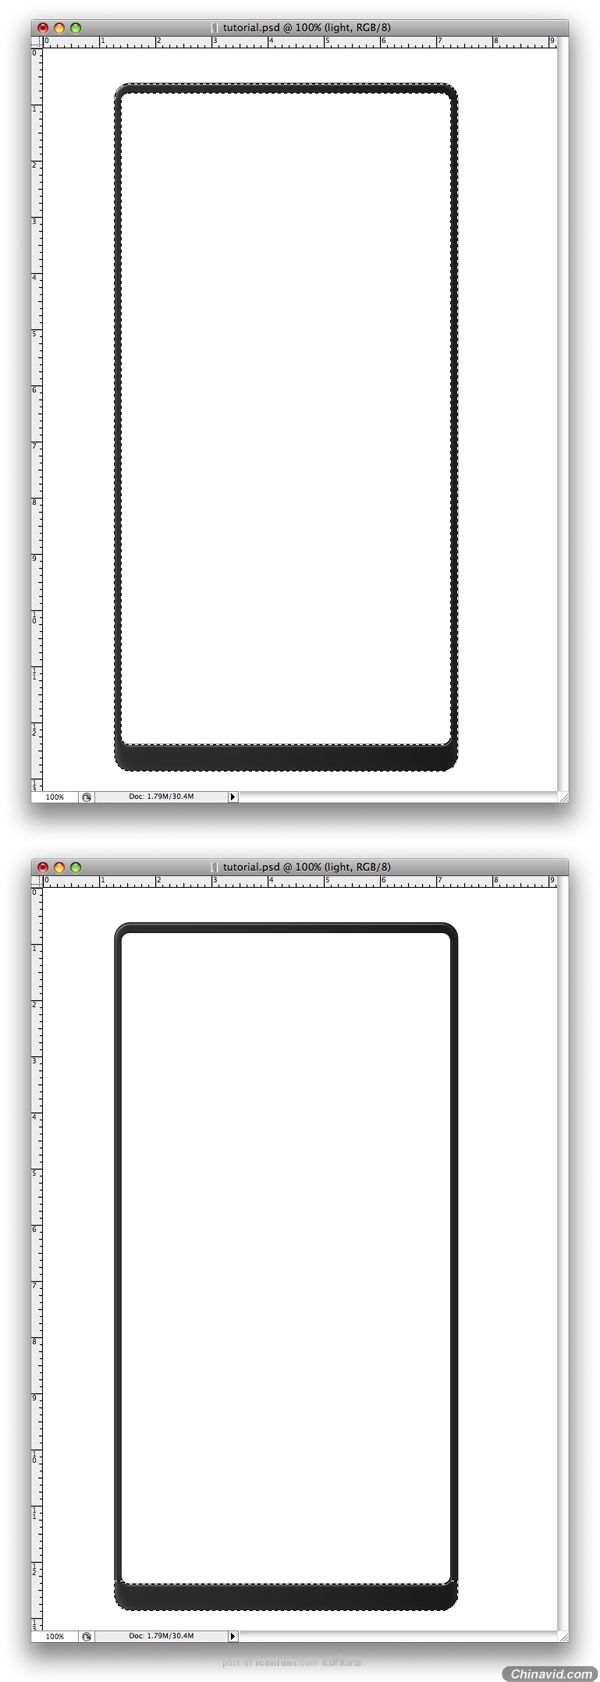
Make a new layer and name it "light." Then Ctrl + Click on the "Phone shape 2" layer thumbnail to make a selection. Then using the Rectangular Marquee Tool (M), take out some of the selection.
使新图层,并将其命名高亮。 然后 Ctrl+ 单击"电话形状 2"层的缩略图,进行选择(创建选区)。 然后使用使用Marquee 工具 (M),进行一些选择。
Step 7
Create a linear gradient using the Gradient Tool (G) set to white and transparent. Then drag and drop from up to down to achieve something similar to below.
创建一个图层,使用渐变工具 (G) 设置为白色和透明的线性渐变。然后从填充,就像下面一样。
Step 8
Using the Eraser Tool (E) set to 0% Hardness, start erasing some of that light, as shown below.
使用橡皮擦工具硬度设置为0% ,开始擦除,如下图所示。
Step 9
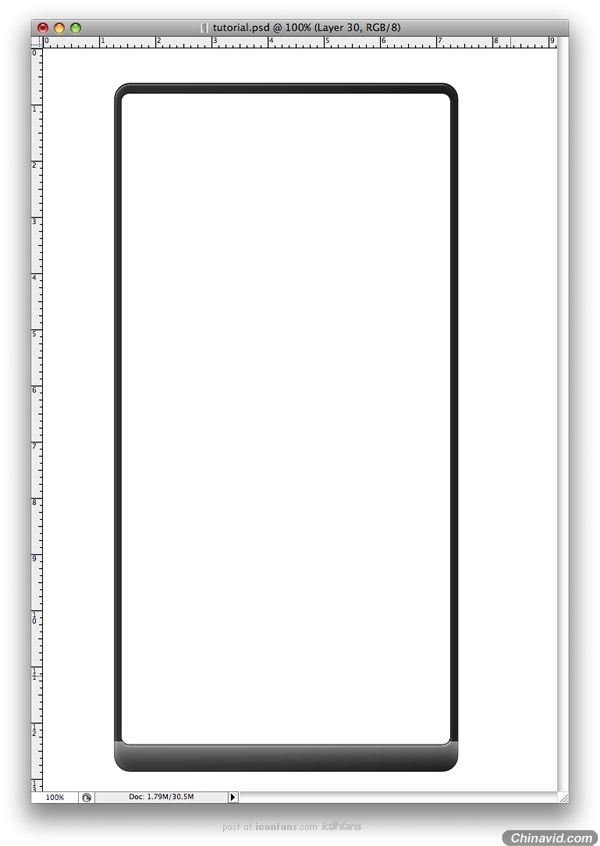
Make paths at the bottom of the phone using the Pen Tool (P).
用钢笔在底部绘制一个路径 。
Step 10
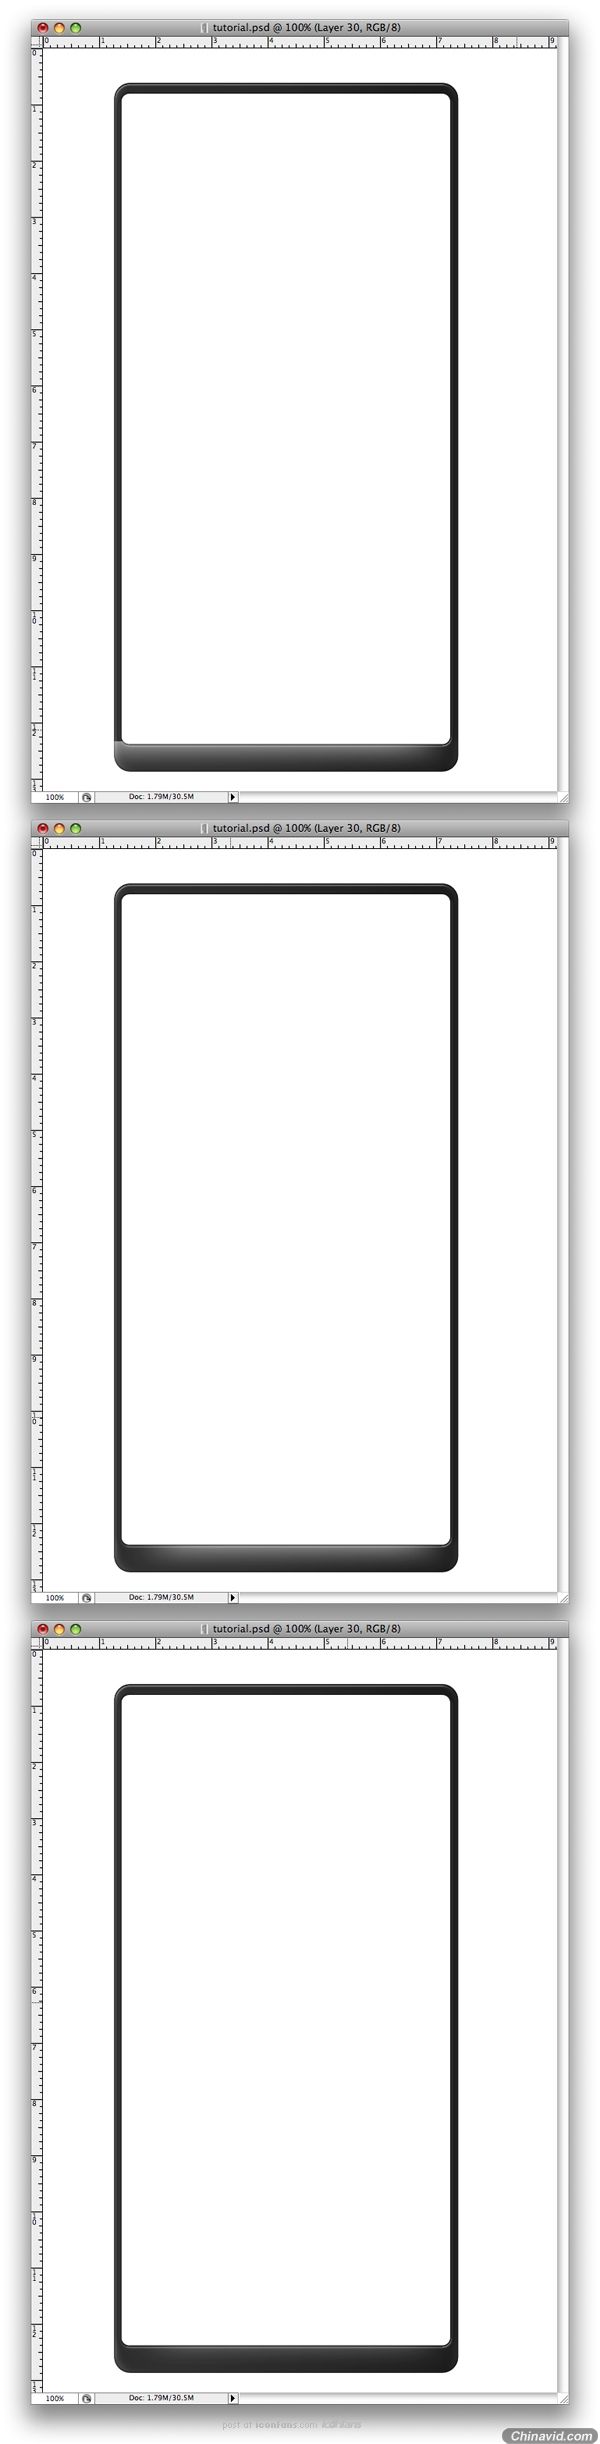
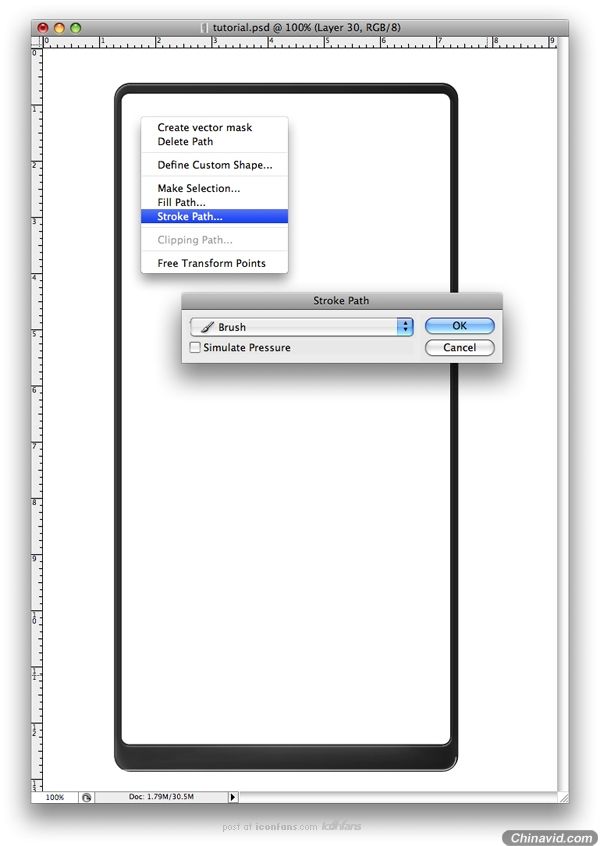
Next you need to make a new layer and name it "light 2." Set your Brush to 1 pixel and also make sure the foreground is white. Grab the Pen Tool, right-click on the screen, and chose Stroke Path. Make sure you select the Brush from the list and also the Pen Pressure must not be checked. Than click OK. Lastly, you will need to delete the path so you can see the stroke.
接下来您需要进行新的层并命名"高光2"。您的画笔设置为 1 个像素,并还确保前台是白色。将画笔工具,右键单击屏幕和选择 Stroke 路径。确保从列表中选择,笔刷也不必须检查画笔压力。单击确定。 最后,您将需要删除路径,就象下图。
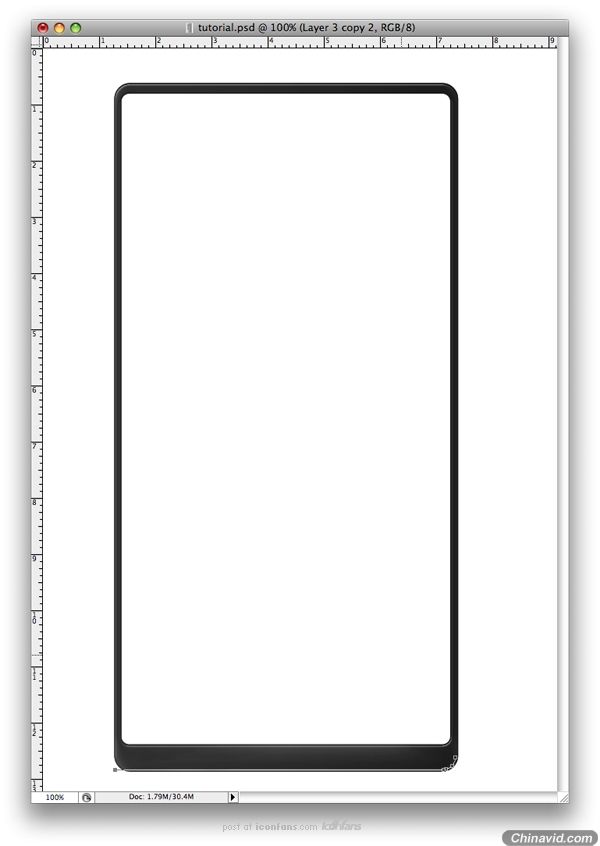
Step 11
Erase the ends of the stroke. Then go to Filter > Blur > Gaussian Blur, and select a radius of 0.7 pixels.
删除端点。 然后转到滤镜 >模糊> 高斯模糊 并选择 0.7 像素的半径范围。
Step 12
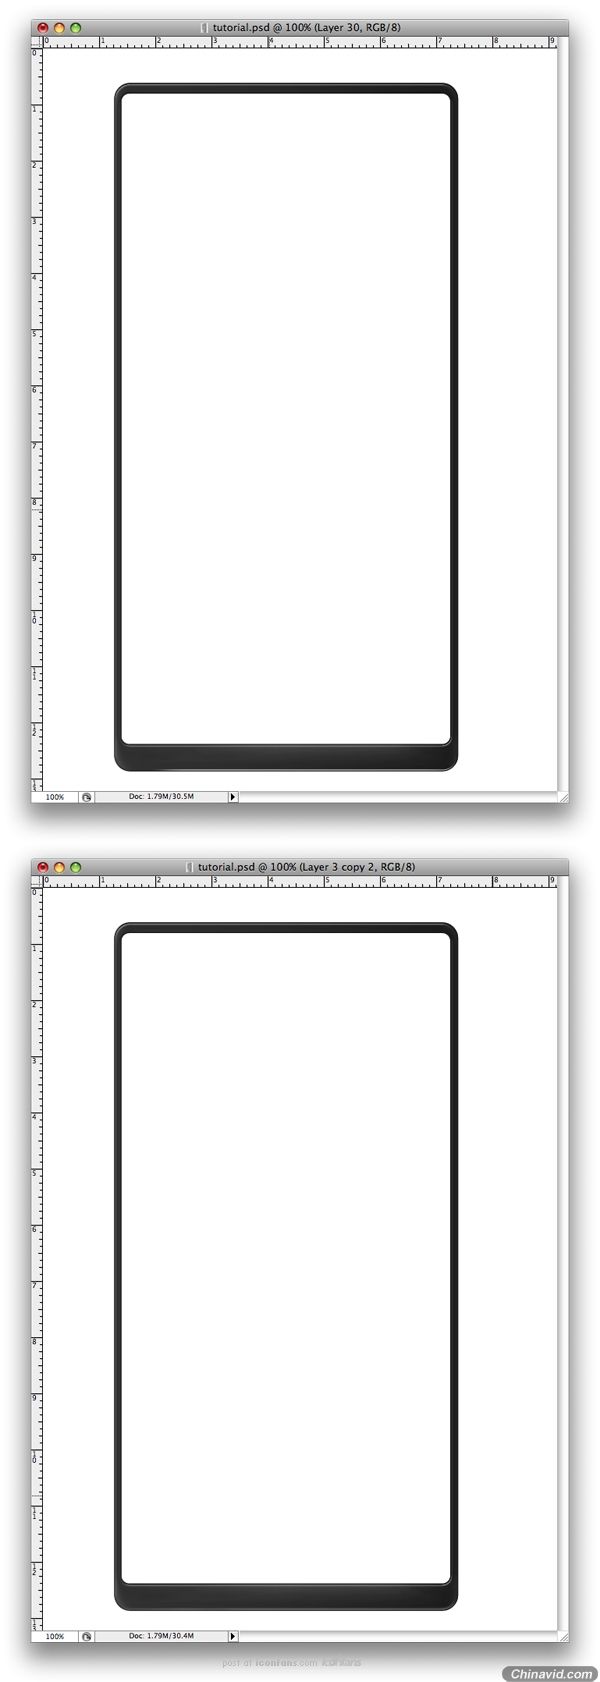
The next steps you'll need to do are to repeat the same lightning effect for all the sides. We also changed our background color to black. Follow the images below.
接下来的步骤,您需要做的是重复同样的闪电效果,改变了背景颜色为黑色。按照下面的图片。


Step 13
We're done with this part of the phone. You should move it into a new folder and name it >Exterior side.> Now it's time to make the interior. First, I'll make a new folder and name it >Interior side.> In this folder make a new folder and name it >bottom side.> This is where the buttons will go. Then using the Rounded Rectangle Tool (U), make a shape as I did.
我们正在做这部分的手机。移动到一个新文件夹,并将它命名为>外侧。 > ,现在的时间,制作内部。首先,我将作出一个新的文件夹,并将它命名为>内部。 >在此文件夹中作出新的文件夹,并将它命名为>底部。 > ,这是按钮。然后使用,圆角矩形工具 (U),就象下图
Step 14
Subtract the upper part of the shape, using the Rectangle Tool (U).
使用矩形工具减去形状的上部.

Step 15
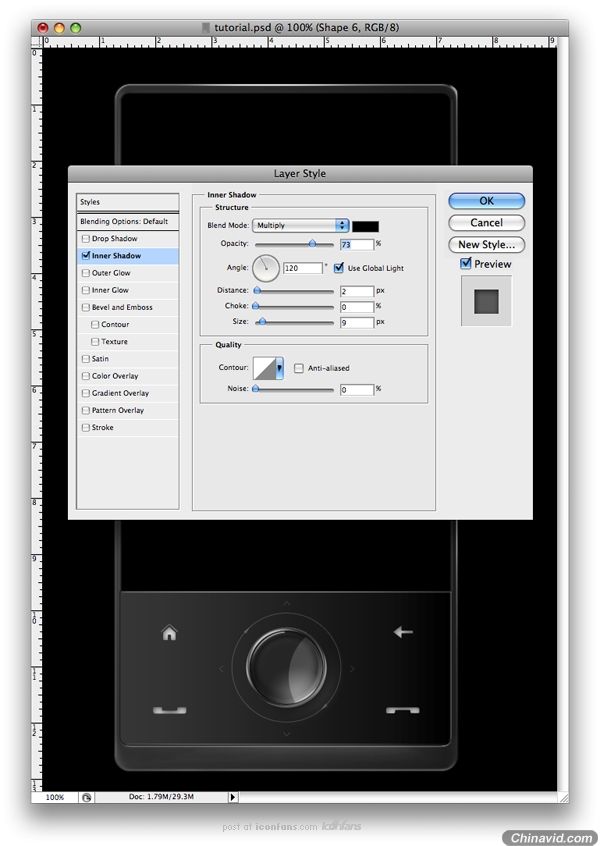
Double-click on the layer to enter the Blending Options, and use the settings below.
双击图层进入混合设置, 并使用以面的设置.
Step 16
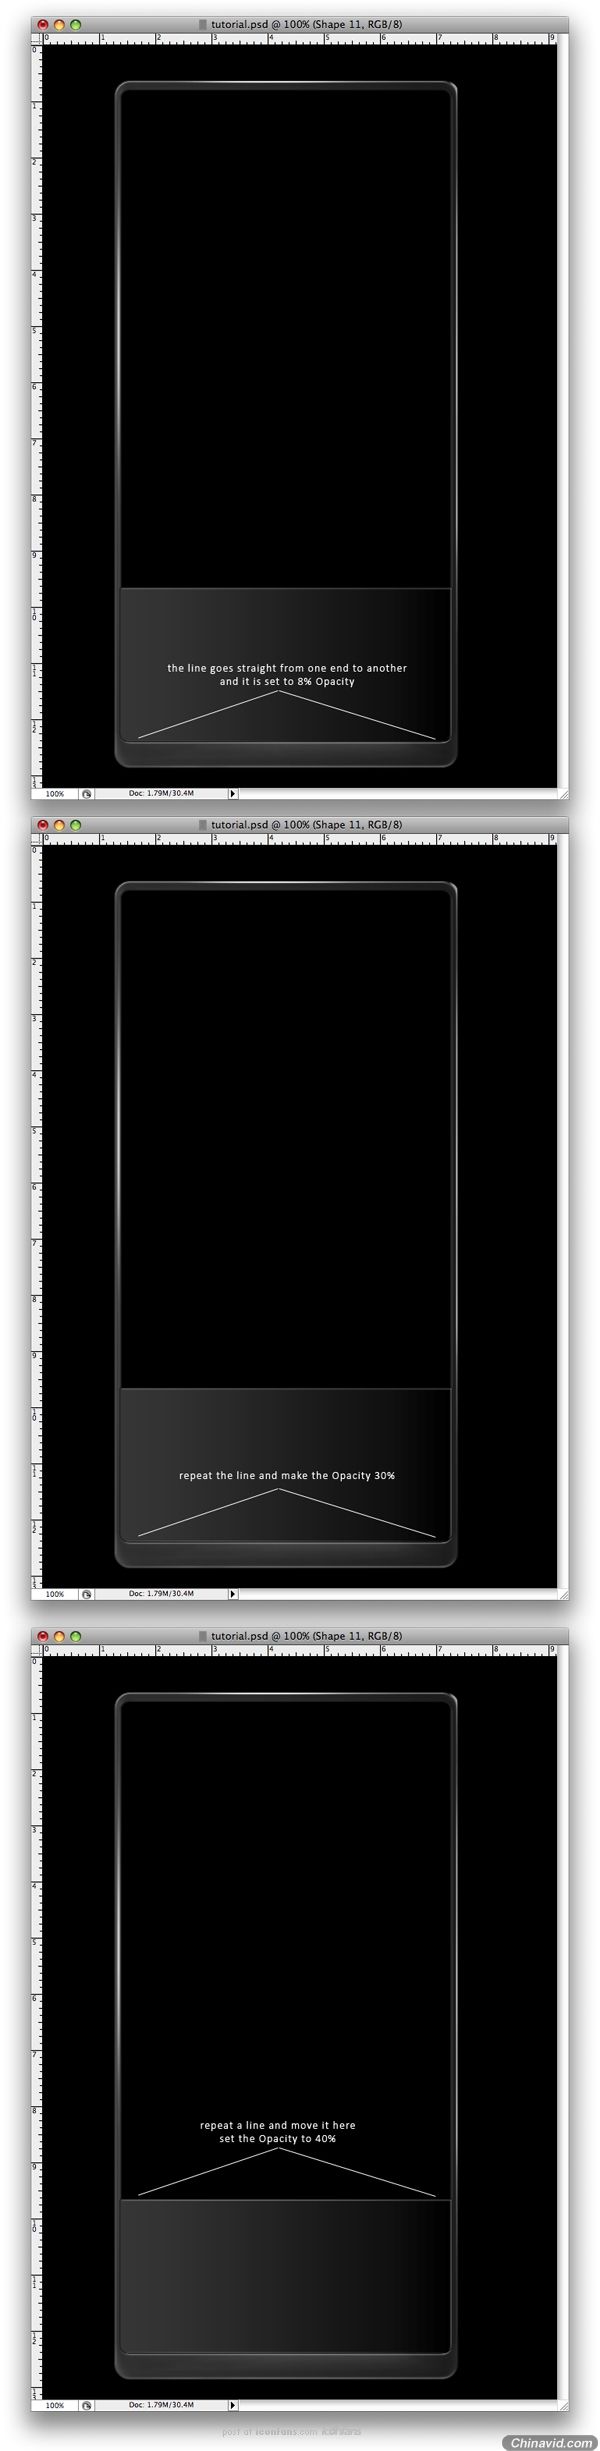
Next you need to make some more lights on this shape. You'll do this just as you did in Step 9, but this time you'll use the Line Tool (U).
下面你要在这个形状上增加更多光线, 你可以和你在第9步已做的那样来做, 不过这次你需要使用直线工具.
Step 17
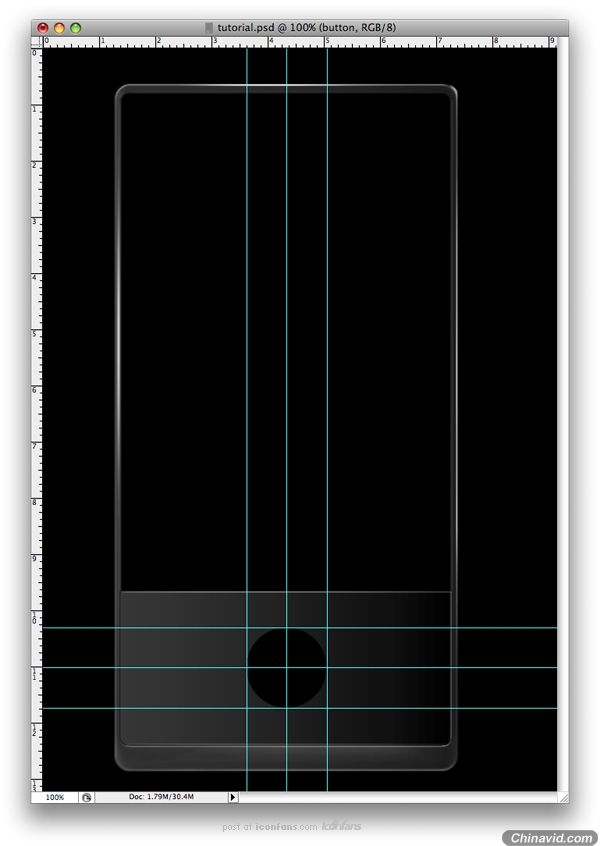
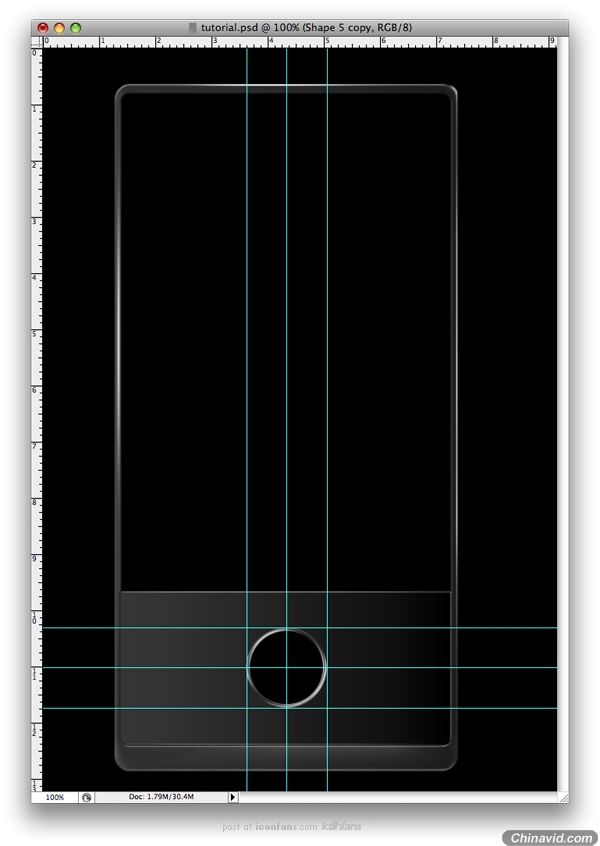
This part of the phone is finished. Now we need to make the buttons. First make a new folder and name it "Button." In this folder, you need to make a black rounded shape using the Ellipse Tool (U). As you can see, I have used the Grid because I want the buttons to be centered.
到这一步手机已完成, 现在我们需要创建那些按钮, 先创建一个新图层夹(其实是图层, 这老兄喜欢把图层叫folder, 我晕. 我后来才发现的, 如下雷同!!)并命名为"Button". 你需要用椭圆工具创建一个黑色圆形(快捷键U), 如你所见的, 我使用了网格线因为我想让那些按钮被居中.
Step 18
Use the settings shown below for the Blending Options of this layer.
给这个图层增加如下的混合设置.
Step 19
Make a new circle, but this time make it a little smaller. When you start making the circle start from the middle of the other circle, hold down the Alt + Shift buttons and drag. This will help you make the circle perfect and in the right position.
创建一个新圆, 不过这次要让它小一点, 当你要在另一个圆的正中创建一个圆时, 按下ALT+SHIFT按键并拖动, 这将帮你创建圆到正确的位置.
Step 20
Again, change the Blending Option Settings to match those shown below.
再次打开混合设置并设置如下.

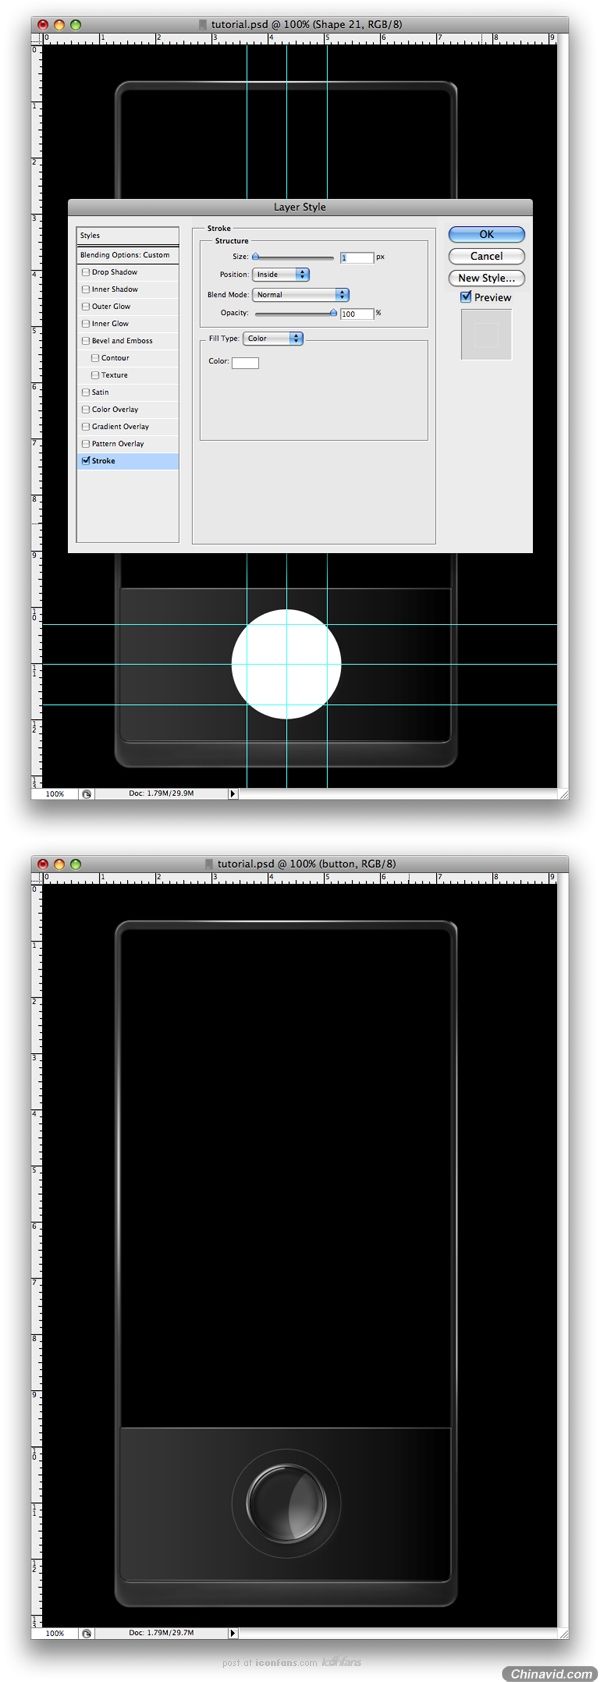
Step 21
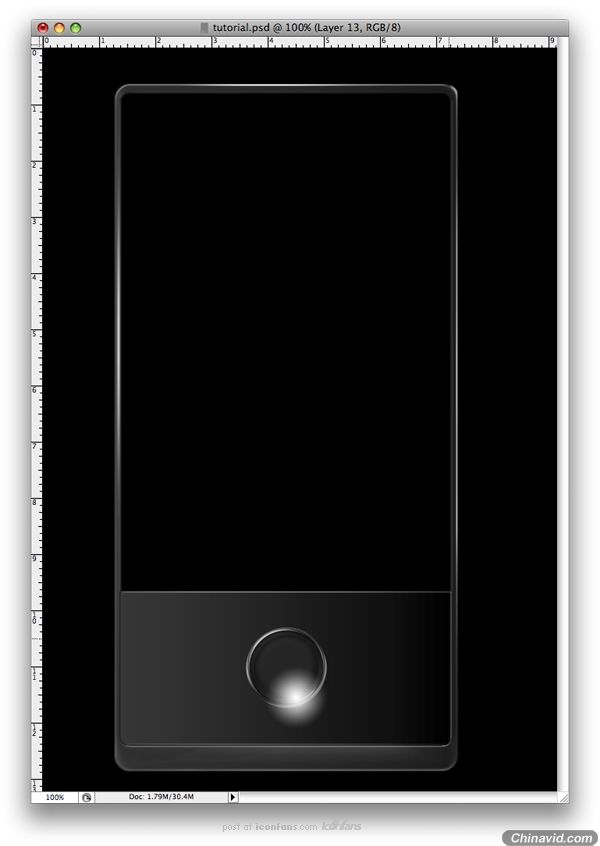
Make a new layer above the circles. Call it "Shine 1." Using the Gradient Tool (G) set to Radial Gradient and to white, click and drag as I did.
在圆的上面创建一个新图层, 命名为"Shine 1", 使用渐变工具(快捷键G)并设置为放射渐变白变(白变渐变到透明, 他这没写), 点击并拖动出一个白色渐变 (他写的是点击并拖动就像我做的那样).
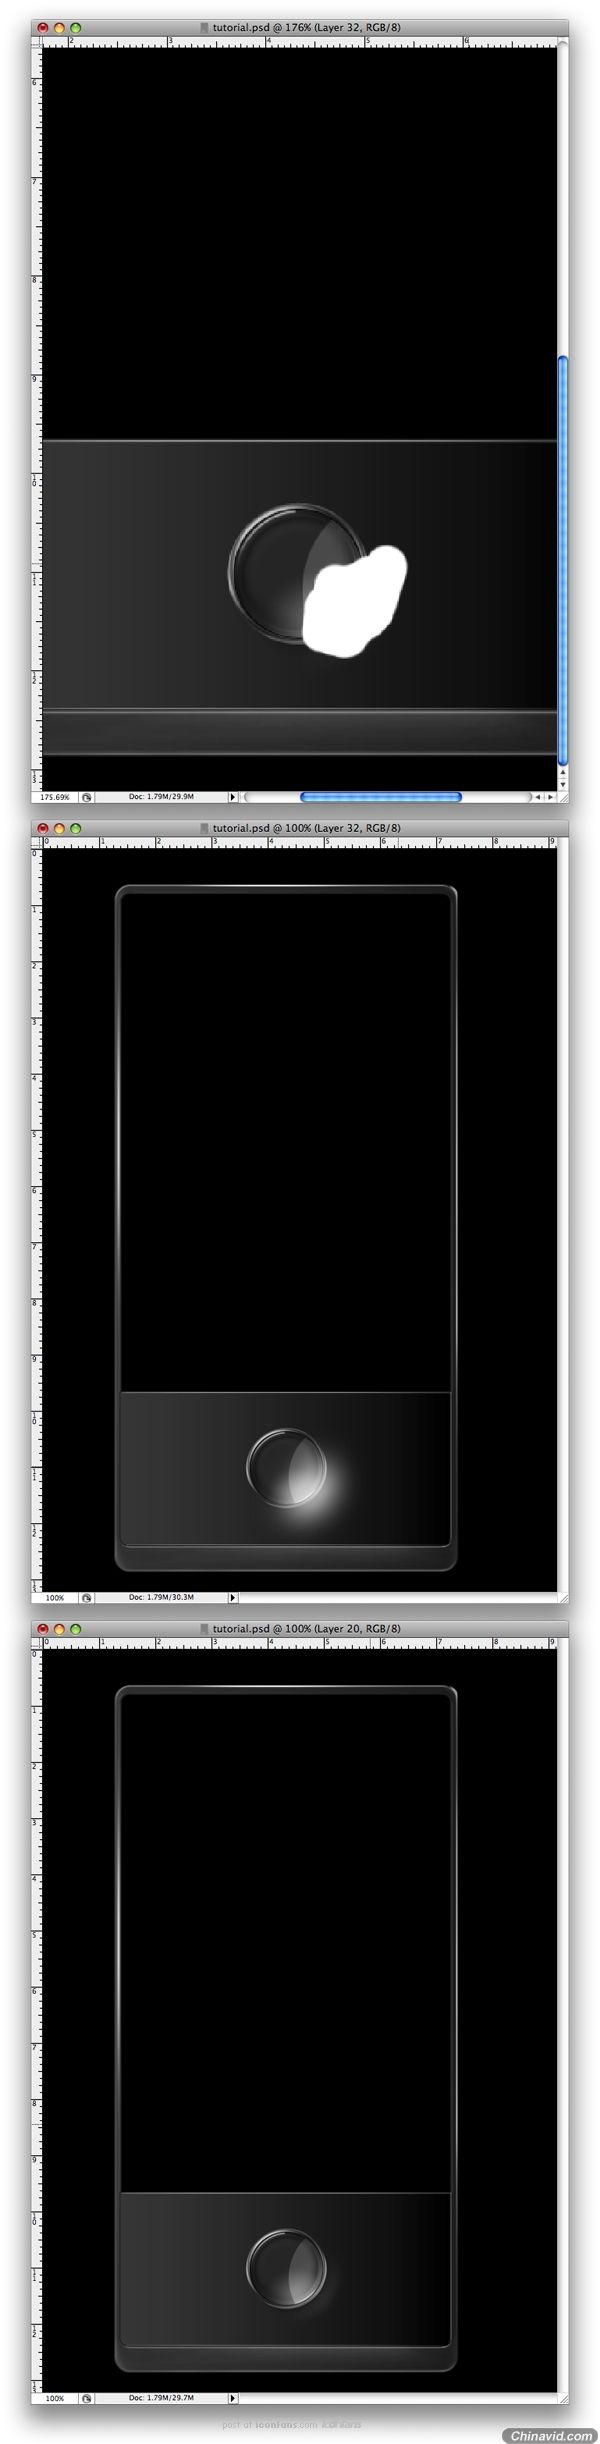
Step 22
Now you'll need to mask the light to show only into the button. Next set the layer to Linear Light with 34% Opacity.
现在你需要遮住那个光让它只显示在按钮里, 下一步设置图层为34%透明度的线性光.

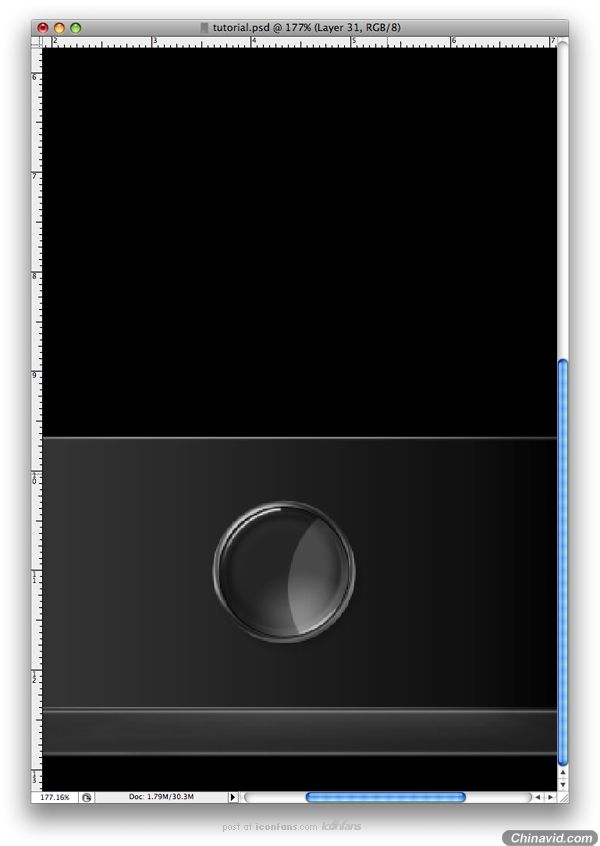
Step 23
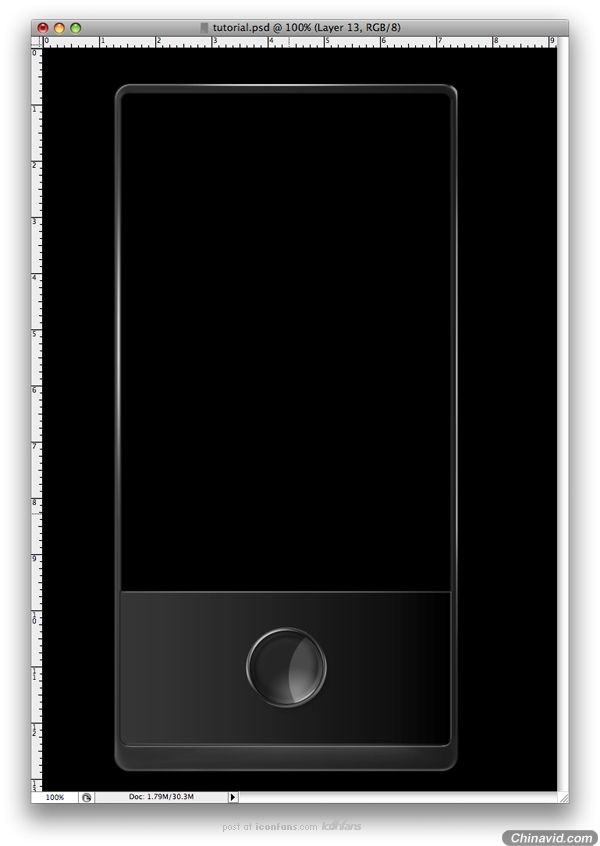
Make a new layer and name it "Shine 2." Make a selection as I did using the Elliptical Marquee Tool (M). Fill the layer with white, mask it so that it will be visible only on the button, and set it to Soft Light with 70% Opacity.
创建一个新图层并命名为"Shine 2". 使用椭圆选区工具(M)如我那样创建一个选区, 并用白色填充, 遮住它以便只让它显示在按钮上, 并设置为70%透明度的柔光.
Step 24
Using the Pen Tool (P), make a path. Set the Brush to 2 pixels with a Hardness of 100%. Grab the Pen Tool (P) and make a Stroke. Again, make sure you make the Stroke to white.
使用钢笔工具(P)创建一个路径, 设置笔刷为100%硬度,2像素, 然后描边(他写的是抓住钢笔工具并制作一个描边). 确定你创建的描边是白色的.
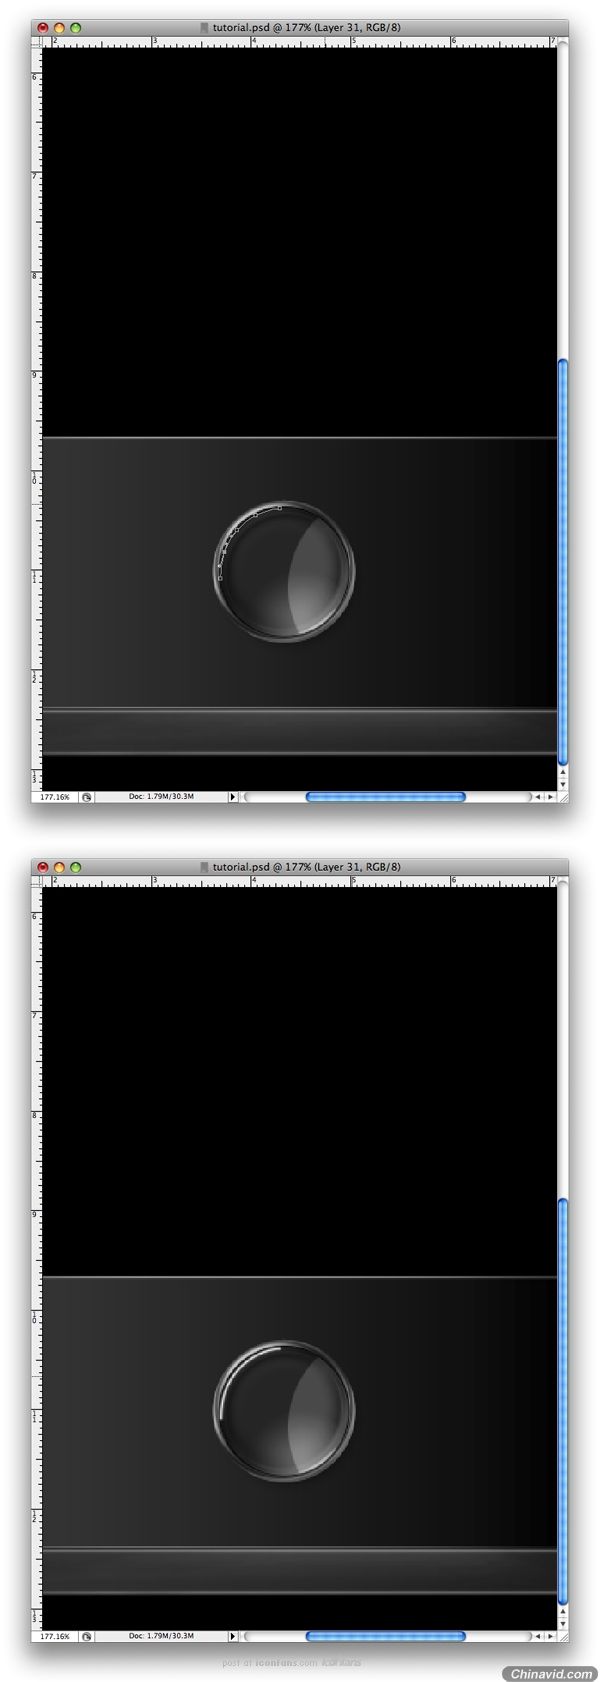
Step 25
Using the Eraser Tool (E), erase the lower part of the line a little to make it fade.
使用像皮擦工具(E), 擦除线的下部一点点以让它溶入.
Step 26
Set the stroke to 70% Opacity. Make a new layer and draw a white spot. Go to Filter > Blur > Gaussian Blur and chose an 18.5% setting. Next set the layer to Soft Light.
设置线的透明度为70%. 创建一个新图层并画一个白块, 使用滤镜 > 模糊 > 高斯模糊并选择18.5%. 然后下一步设置图层为柔光.
Step 27
You're done with the round button. Now we need to make the touch buttons. First, make a new folder above the button folder and name it "signs." Make a round shape and add the settings shown below. Also, set it to 20% Opacity.
你已完成了圆形按钮, 现在我们要创建触摸按钮, 第一步, 在按钮夹的上面创建一个新图层夹, 命名为"Signs". 创建圆形形状并添加如下的设置, 另外, 设置它为20%透明.
Step 28
Next you need to add these shapes. I have made them using the Line Tool (U) and the arrows I took from the Custom Shape Tool.
下面你需要增加这些形状, 我已经使用线工具(U)创建了它们, 那些箭头我是从自定义形状工具里拿来用的.

Step 29
The next shapes we'll make again using the Pen Tool (P) and the Line Tool (U). Also, use these setting for all of them.
下一步的形状我们将再次使用钢笔工具(P)和线工具(U)创建, 另外, 使用下面的设置应用到全部这些形状上.
Step 30
We are finished with the lower side of the phone. Next we need to make the upper part. Here you need to make a new shape using the Rounded Rectangle Tool (U) set to 10%. Also, you need to fill it with #626262. Then subtract a side of the upper part. Review the image below to know how much you need to subtract.
我们已完成了手机的下部. 下面我们需要创建上部. 现在你需要使用圆角矩形来创建一个新形状并设置为10%(????我觉得应该是角的圆度为10). 另, 你需要用#626262填充它. 然后减去下部(他写的上部的一面). 预览下下面的图片然后你就知道要减去多少了.
Step 31
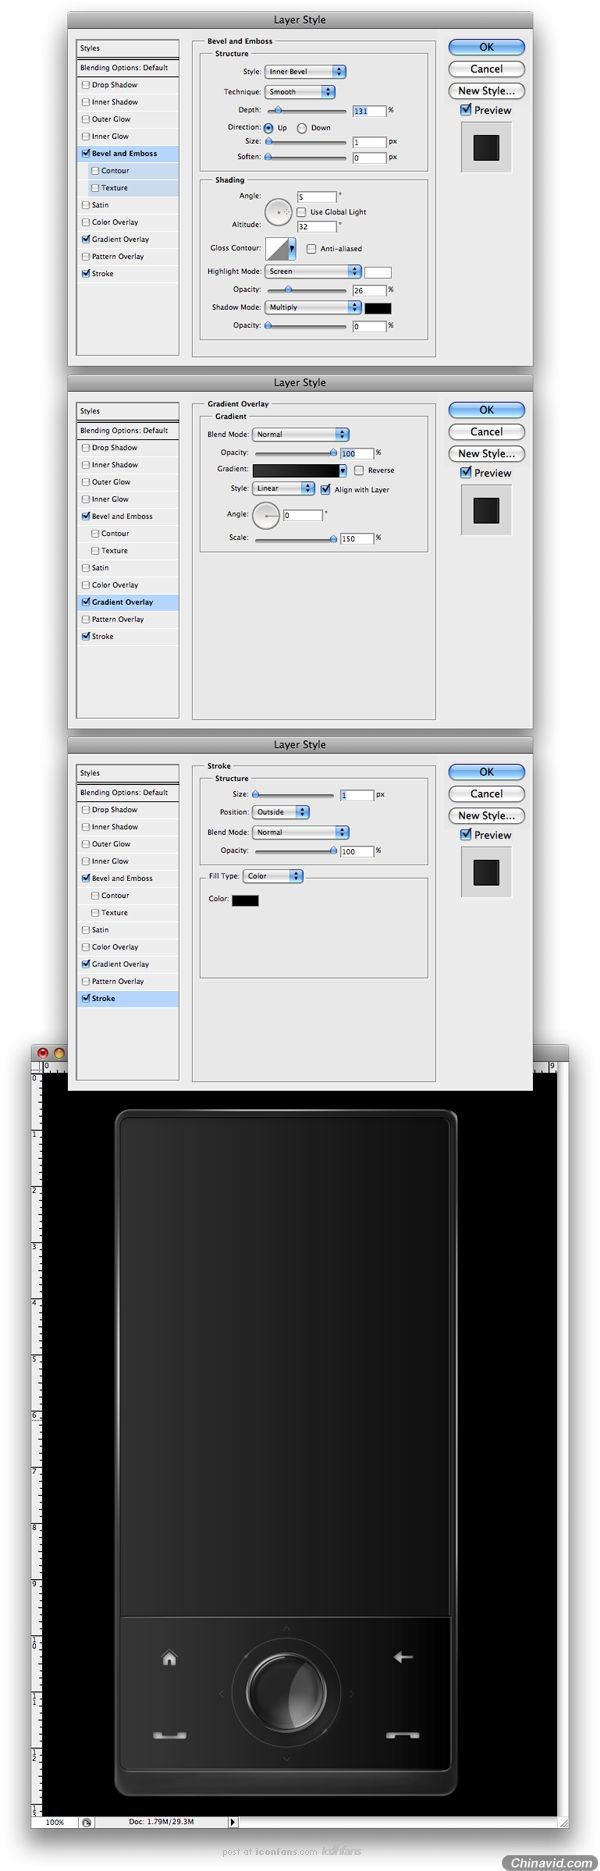
Set the Blending Options for this layer, as shown below.
给这层设置混合设置, 如下所示.
Step 32
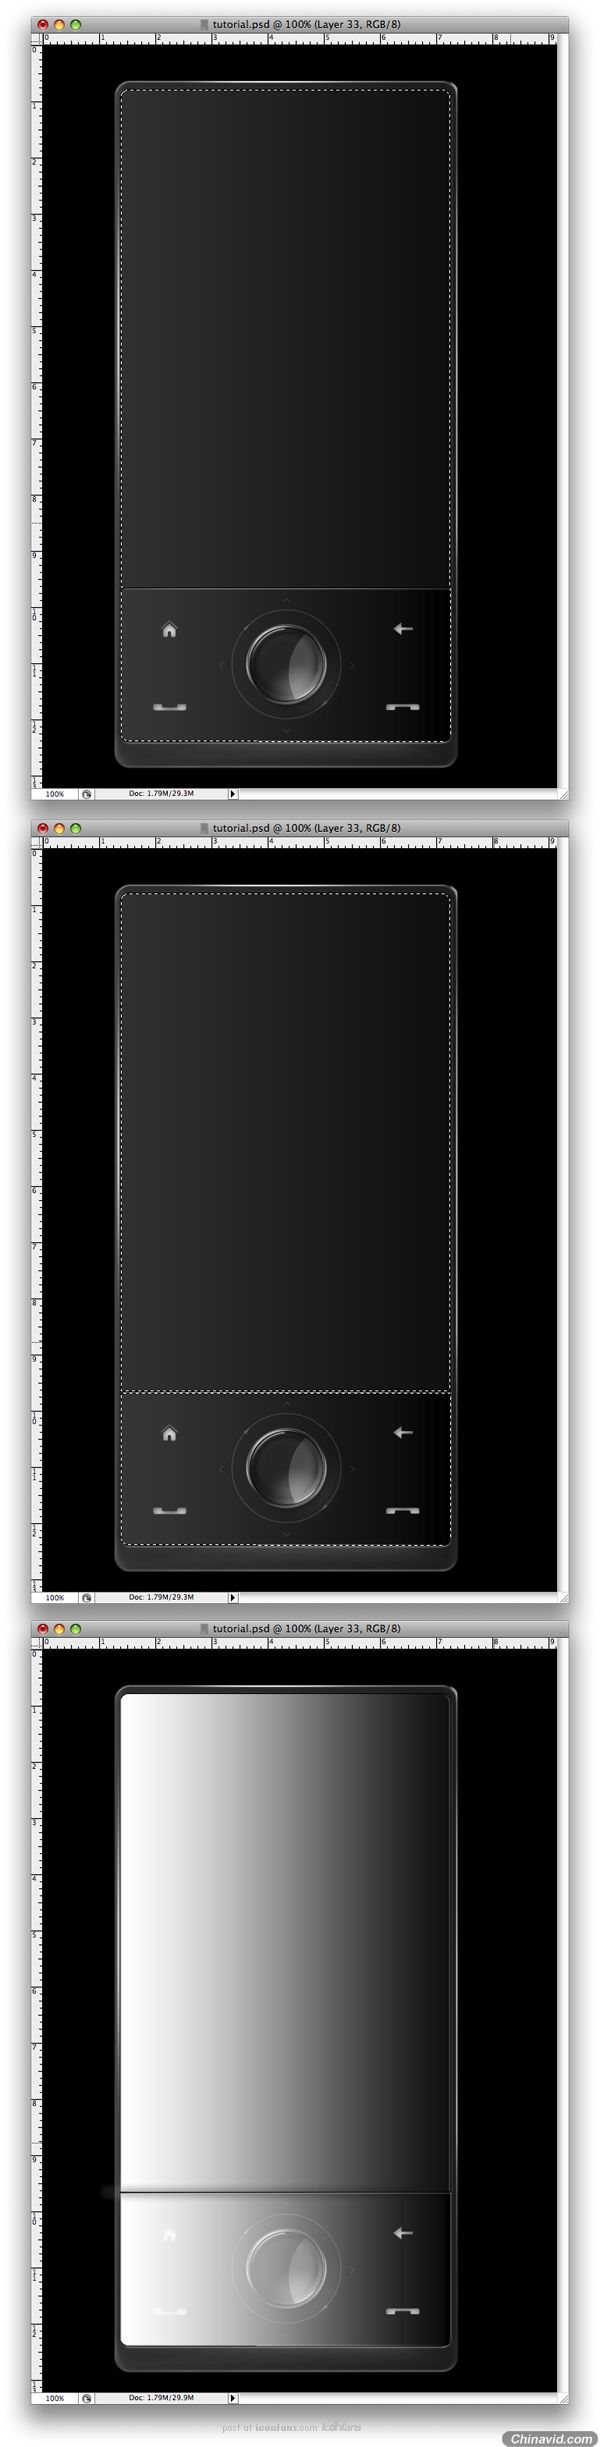
Make a new layer and name it shine. You need to first make a selection as below. Than you need to subtract a part of the selection where the two sides meet. Now you need to use the Gradient Tool (G) to fill the layer with white.
新建一个图层并命名为"Shine", 你需要先创建一个如下的选区, 然后减去上下两个面相交的地方, 现在你需要使用渐变工具(G)以白色到透明填充层.
Step 33
Next you make a random path with the Pen Tool (P). Now that you have the path you need to mask the light over the phone and set the layer to 50% Opacity.
下面你需要用钢笔工具(P)创建一个随意的路径, 现在你需要遮住超过电话区域的部分, 并设置图层的透明度为50%.
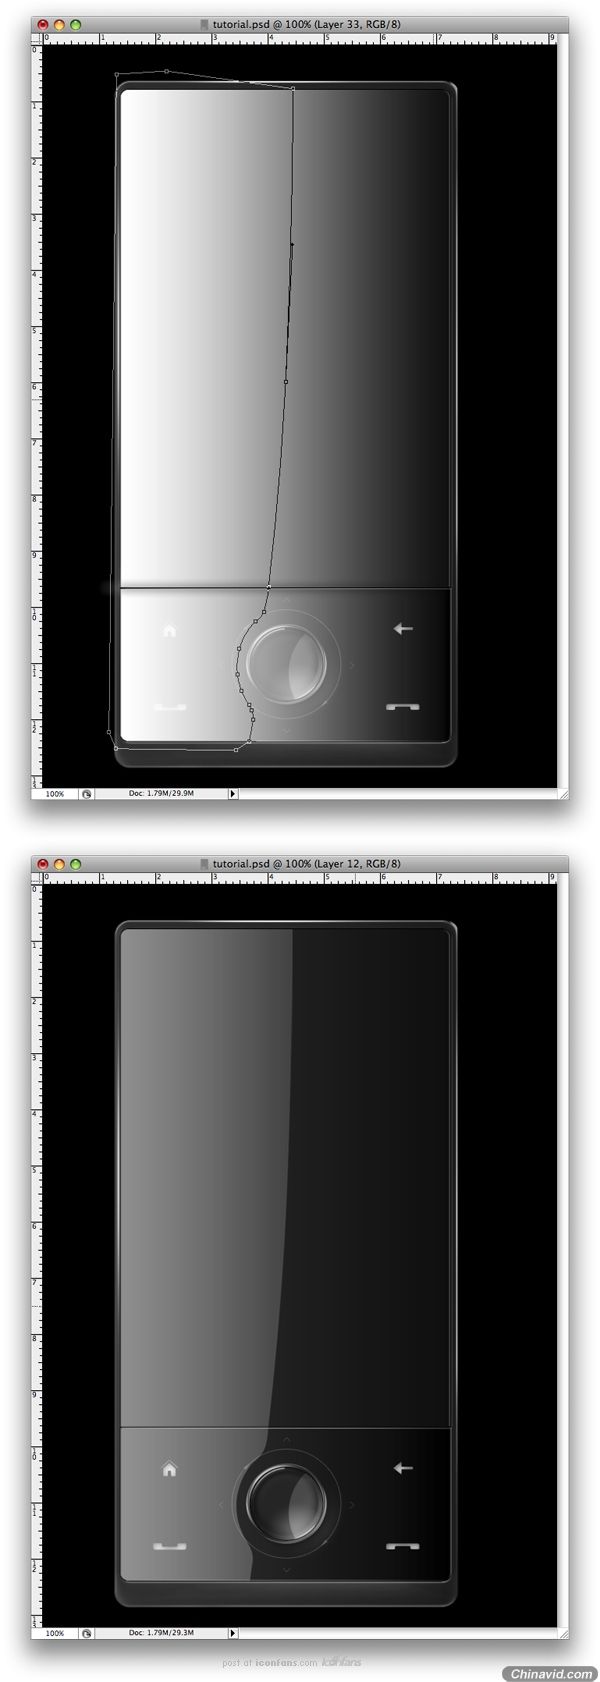
Step 34
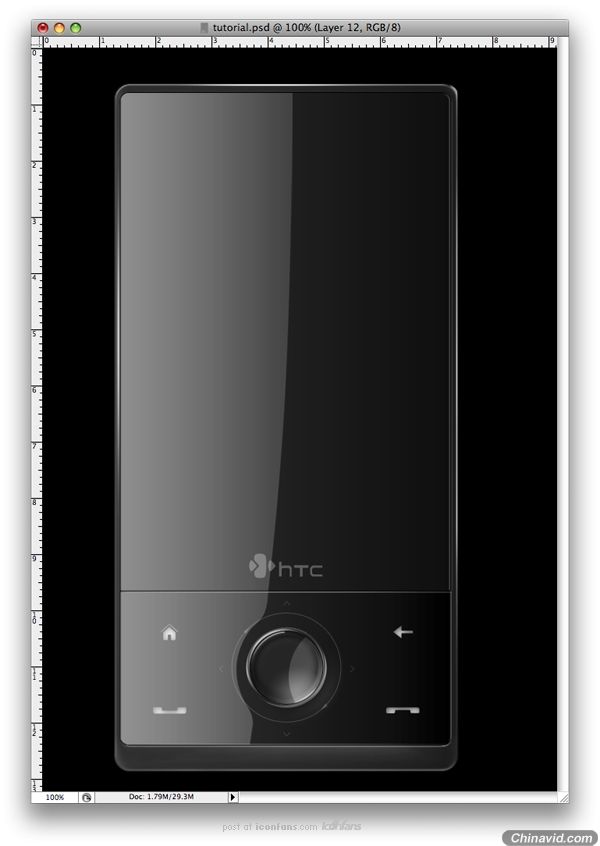
Next we recreate the logo using the Pen Tool (P), or design your own logo.
现在我们用钢笔工具(P)重新创建LOGO, 或者设计你自己的LOGO.

|
